As the frost melts and the first buds of spring begin to peek through the soil, there’s a natural instinct to open the windows and breathe fresh life into our homes. Spring cleaning is more than just a chore; it’s a restorative ritual that resets your environment and boosts your mental clarity. According to a study by the American Cleaning Institute, approximately 74% of Americans engage in spring cleaning every year, recognizing that a deep-clean is essential for maintaining both a healthy home and a healthy mind. For more on this, see our guide on 15 Essential Steps for a Room-by-Room Spring….
To make the most of this seasonal transition, you need more than just a spray bottle and a rag; you need a strategic approach. This guide follows a professional “top-to-bottom” methodology, ensuring that as you clear dust from high shelves and ceiling fans, it doesn’t settle on surfaces you’ve already scrubbed. By decluttering before you deep clean, you’ll save hours of effort and focus your energy where it matters most. Let’s dive into the ultimate 10-step room-by-room guide to transforming your living space. For more on this, see our guide on 10 Genius Tips to Declutter Your Home for….
Kitchen: Deep Cleaning Appliances and Cabinets
The kitchen is the heart of the home, but it’s also the area that accumulates the most grease, grime, and bacteria. To start your kitchen deep clean, begin at the highest point: the tops of your cabinets. These areas are notorious for “grease-dust,” a sticky residue that forms when cooking oils airborne and settle. Use a mixture of warm water and a heavy-duty degreaser or a simple solution of two parts vinegar to one part water to cut through the film.
Reviving the Cabinetry
Once the tops are clear, empty every single cabinet and drawer. This is the perfect time to check expiration dates on canned goods and spices. Did you know that most ground spices lose their potency after six months to a year? Toss anything past its prime. Wipe down the interior shelves with a microfiber cloth and a mild soap solution. For the hardware, use a dedicated metal polish to bring back the shine to brass or stainless steel handles. If your cabinets are wood, consider a nourishing oil-based cleaner to prevent the wood from drying out and cracking.
Deep Cleaning the Heavy Hitters
Your appliances work hard all year, and they deserve a thorough reset. For the refrigerator, pull it away from the wall (carefully!) and vacuum the condenser coils. Dust buildup on these coils can reduce efficiency by up to 25%, costing you more in monthly utility bills. Inside the fridge, remove all glass shelves and soak them in warm, soapy water. Use a toothbrush to scrub the rubber door gaskets where crumbs and mold often hide.
Pro Tip: To deodorize your microwave without scrubbing, place a bowl of water with several lemon slices inside. Microwave on high for five minutes, then let it sit for another two minutes. The steam will loosen baked-on food, allowing you to wipe it away with a single pass of a cloth.
For the oven, skip the harsh chemical self-clean cycle, which can reach temperatures over 800°F and potentially damage your appliance’s electronic components. Instead, create a paste of baking soda and water. Slather it on the oven walls, let it sit overnight, and spray it with vinegar the next morning. The resulting fizzing action will lift the grease effortlessly. Expect to spend about 45 to 60 minutes of active work on the oven, plus the overnight soak time.
Living Room: Refreshing Upholstery and Hidden Dust
The living room is where we relax, but it’s also a magnet for dust mites and pet dander. The Environmental Protection Agency (EPA) notes that indoor air can be two to five times more polluted than outdoor air, largely due to trapped particles in soft surfaces. To tackle this, we must go beyond the weekly vacuuming routine.
Upholstery and Soft Surfaces
Start by stripping all removable covers from throw pillows and blankets and tossing them in the wash according to their care labels. For the sofa itself, use the upholstery attachment on your vacuum to reach deep into the crevices. If you have a fabric sofa, consider renting a professional-grade steam cleaner for approximately $30-$40 a day from a local hardware store. This will extract deep-seated dirt and allergens that a vacuum simply can’t reach. For leather furniture, use a high-quality leather conditioner to keep the material supple and prevent peeling.
The War on Hidden Dust
Dust tends to hide in places we rarely look. Use a telescoping duster to clean ceiling fan blades and light fixtures. If your ceiling fan is particularly dusty, try this hack: slide an old pillowcase over each blade and pull it back. The dust stays inside the pillowcase instead of falling onto your furniture. Move your furniture—yes, all of it—to vacuum the baseboards and flooring underneath.
Electronics and Media Centers
Dust is the enemy of electronics. Use compressed air to blow out the vents of your gaming consoles, cable boxes, and television sets. Static-electricity-reducing cloths are excellent for screens, but avoid using ammonia-based cleaners, which can strip the protective coatings off modern displays. Organize the “cable nest” behind your TV using Velcro ties or cable management sleeves to prevent future dust bunnies from forming.
Pro Tip: To clean your baseboards without bending over, attach a microfiber cloth or a dryer sheet to the end of a Swiffer mop. The dryer sheet will not only pick up dust but also leave a thin layer of anti-static coating that repels future dust for weeks.
Bathroom: Sanitizing Surfaces and Replacing Essentials
The bathroom requires a high-level sanitization approach. Humidity makes this room a breeding ground for mold and mildew, so the goal here is to eliminate moisture-loving microbes and refresh the fixtures.
Scrubbing the Grout and Tiles
Grout is porous, meaning it absorbs dirty water and soap scum. To restore your grout to its original color, create a paste using 3/4 cup baking soda and 1/4 cup hydrogen peroxide. Apply it to the grout lines, let it sit for 15 minutes, and scrub with a stiff-bristled brush. This eco-friendly method is just as effective as commercial bleach but much safer for your lungs. For the showerhead, if you notice uneven water flow, it’s likely clogged with calcium deposits. Fill a plastic bag with white vinegar, submerge the showerhead in it, and secure it with a rubber band. Leave it for two hours (or overnight) to dissolve the scale.
The Essential Swap
Spring cleaning is the ideal time to replace items that have reached the end of their hygienic life. Replace your toothbrush (or electric brush head) every three months; if yours is frayed, it’s overdue. Swap out your plastic shower curtain liner if it has any orange or black spots. Most fabric shower curtains can be laundered, but plastic liners are often better replaced for under $10. Check your medicine cabinet and safely dispose of any expired medications or beauty products. Most sunscreens, for example, lose their efficacy after 12 months.
Deep Cleaning the Vanity
Empty the drawers and wipe down the organizers. Use a 50/50 water-vinegar solution to clean the mirror for a streak-free finish. Don’t forget the exhaust fan—remove the cover and vacuum the dust from the motor. A clean fan pulls moisture out of the room faster, preventing mold from returning.
Bedroom: Flipping Mattresses and Seasonal Wardrobe Swaps
We spend a third of our lives in the bedroom, yet it’s often the last place to get a deep clean. This step is about improving your sleep quality by creating a pristine, allergen-free environment.
Mattress Maintenance
Your mattress is an investment, and proper care can extend its life by years. Strip all bedding and wash it on the hottest setting allowed by the fabric. While the bed is bare, sprinkle the mattress with a generous layer of baking soda. Let it sit for at least two hours to absorb odors and moisture, then vacuum it thoroughly using the hose attachment. If you have a traditional innerspring mattress, flip it over. If you have a modern memory foam mattress, rotate it 180 degrees. Most manufacturers recommend this every six months to prevent sagging and uneven wear.
The Wardrobe Transition
Decluttering your closet is a vital part of the spring cleaning process. Use the “one-year rule”: if you haven’t worn an item in the last 12 months, it’s time to donate or sell it. Organize your clothes by type or color to make getting dressed in the morning a breeze. For seasonal storage, invest in vacuum-seal bags to compress bulky winter coats and sweaters. This can save up to 75% of your storage space.
Bedside and Lighting
Dust the lampshades and wipe down the nightstands. If you have a wooden headboard, use a wood polish to remove finger oils and dust. Wash your pillows! Most down and synthetic pillows are machine washable; check the tags. Drying them with a few clean tennis balls or wool dryer balls will help them regain their loft.
Pro Tip: To keep your closet smelling fresh all season, tuck a few cedar blocks or dried lavender sachets between your folded clothes. This provides a natural scent and acts as a deterrent for moths and other pests.
Entryway and Storage: Decluttering High-Traffic Zones
The entryway is the first thing you see when you come home, and it sets the tone for the rest of your space. Unfortunately, it’s also the “dumping ground” for shoes, mail, and bags.
Managing the Mudroom
Start by removing every shoe, coat, and umbrella from the area. Clean the floor mats thoroughly—if they are rubber-backed, you can often hose them down outside. For carpeted mats, use a stiff brush to loosen dried mud before vacuuming. Deep clean the door frame and the door itself, paying special attention to the area around the handle where germs accumulate.
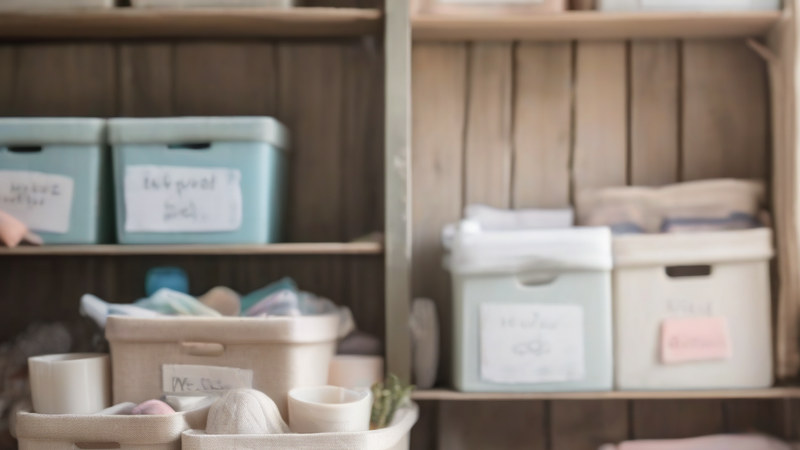
Storage and Organization
If your entryway lacks a system, now is the time to build one. Install hooks for keys and bags to keep them off the floor. Use a small tray for incoming mail to prevent paper clutter from spreading to the kitchen counters. In your storage closets or garage, use clear plastic bins with labels. Being able to see what’s inside a bin without opening it is a major time-saver. Aim to spend about two hours decluttering and organizing these high-traffic zones.
Walls and Windows
Finish your spring cleaning by wiping down the walls in the entryway. Scuff marks can often be removed with a “magic eraser” sponge. Wash the windows inside and out. For the exterior, a hose-end window cleaner makes the job fast and easy, allowing you to reach second-story glass without a ladder.
Spring cleaning might seem like a daunting task, but when broken down into these 10 manageable steps, it becomes an achievable weekend project. By focusing on deep-cleaning the areas that are often missed during your weekly routine—like appliance coils, mattress surfaces, and hidden dust zones—you create a home that isn’t just visually clean, but truly healthy. Embrace the process, use your natural cleaners, and enjoy the renewed energy that a fresh, organized home provides. For more on this, see our guide on 7 Essential Tips for Your Perfect Spring….
You Might Also Like
- Spring Garden Planting Schedule: 7 Steps to a Flourishing Harvest
- 7 Essential Steps to Declutter Your Home for Spring Success
- 7 Simple Steps to Declutter Your Home for Spring Success
Frequently Asked Questions
When should I start spring cleaning?
The best time to start is as soon as the weather consistently stays above 50°F (10°C), allowing you to open the windows for ventilation. Most people find that a weekend in late March or early April provides the perfect “fresh start” feeling.
What are the most forgotten areas during spring cleaning?
The most commonly overlooked spots include the tops of door frames, the tracks of sliding glass doors, the interior of the dishwasher filter, and the dust-collecting coils behind the refrigerator. Don’t forget to also sanitize your remote controls and light switches!
How long does it typically take to deep clean an entire house?
For a standard 2,000-square-foot home, a thorough deep clean usually takes between 15 and 20 man-hours. You can spread this over two full days or tackle one room per day over the course of a week to make it more manageable.